How to Properly Install a Photocontrol Sensor (JL-103 Series) — A Complete Guide from Long-Join
Introduce
Installing a photocontrol sensor might look simple — just three wires and a nut. But the way you install it determines how stable and efficient your street lights will be over time.
At Shanghai Long-Join Electronics, we’ve helped thousands of engineers and city maintenance teams install our JL-103 Direct Wire-in Photocontrols safely and correctly.
This guide answers every question you might have — from wiring to orientation — so your lights work reliably from dusk to dawn.

What Is a Photocontrol Sensor and Why Does It Matter?
Ever wondered why street lights turn on automatically at night? That’s the work of a photocontrol sensor, also called a photoelectric sensor or light sensor photocell switch.
It detects the surrounding light level and switches the circuit on at dusk and off at dawn without human help.
In simple terms, the photocontrol sensor acts as the “eyes” of your outdoor lighting system. It makes your lamps run only when needed. That saves energy and extends life.
Our JL-103 photocell control units use a sealed light-sensing element paired with a precision electronic relay. Once light drops below a set lux threshold (for example < 50 lux), it sends a signal to power the street lamp.
Quick Fact: Modern photocell systems can reduce street-light energy use by 30–40 %, according to Energy.gov.
How Does the JL-103 Photocontrol Sensor Work?
Many installers ask, “What makes the JL-103 special compared to standard dusk-to-dawn photocells?”
The answer lies in its direct wire-in design and anti-flicker control circuit.
Inside the JL-103 photocell sensor sits a photoelectric part. It reacts when the surrounding light level changes.
As sunset comes, the light fades. The sensor’s resistance drops. This change triggers the control relay, turning your lamp ON. When daylight returns, the resistance increases and the relay switches OFF.
Long-Join adds a built-in delay of 1–2 minutes to prevent false switching from lightning or passing headlights.
Main Technical Features
Feature | Description |
Voltage range | 120 V / 208 V / 240 V / 277 V AC options |
Rated load | 1800 W (Tungsten) / 1000 VA (Ballast) |
Operating temperature | –40 °C ~ +70 °C |
Waterproof grade | IP65 (sealed for outdoor use) |
Delay time | 1–2 minutes anti-flicker protection |
How Do You Connect The Wires The Right Way?
If you’re unsure about wiring, you’re not alone. Many new installers mix up the load and line wires. That single mistake can cause the sensor to fail or flicker.
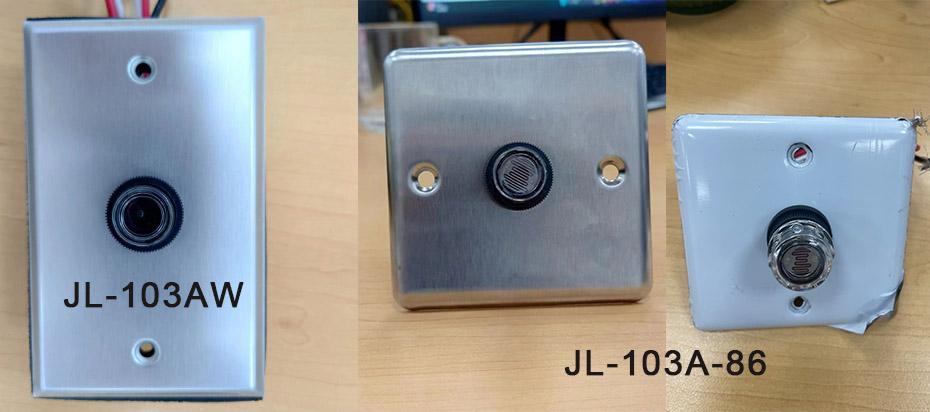
The JL-103 sensor has three wires, pre-stripped and color-coded. Proper wiring keeps it safe and strong over time.
Wiring Color and Function
Wire Color | Function | Connection Point |
Black | Line (Power In) | Connect to AC live wire (L) |
Red | Load (Output) | Connect to the lamp or ballast |
White | Neutral | Connect to AC neutral wire (N) |
Installation Tips
- Check the voltage label before you wire. Wrong voltage shortens lifespan.
- Use waterproof connectors in outdoor boxes. Add heat-shrink sleeves to prevent corrosion.
- Don’t share the neutral with heavy loads like pumps or motors. It can cause false trigger trips.
Important: Never reverse the red and black wires. The photo sensor logic circuit is directional; reversing can permanently damage the relay.
What Simple Steps Make Installation Safe And Smooth?
Installing a light photocell sensor isn’t only about connecting wires; mechanical placement matters just as much. Follow this five-step guide used by our field engineers.
Step 1 — Power Off
Always cut power before opening the junction box. Confirm with a voltage tester. Even a low residual current can damage the photo control circuit.
Step 2 — Mounting
Insert the sensor through a 16 mm hole on the lamp housing or junction box.
Secure it using the zinc-alloy lock nut and rubber gasket included. Tight sealing keeps the system IP65 waterproof.
Step 3 — Orientation
Aim the sensor window north to avoid direct sunrise or sunset glare. If mounting on poles, tilt it 5–10° upward to reduce reflection from the road surface.
Step 4 — Wiring
Connect the wires as shown in the table. Tighten them well, and keep copper strands hidden. Use a multimeter to make sure continuity.
Step 5 — Testing
After wiring, power ON. Cover the sensor window with opaque tape or cloth (not your hand). The light should turn ON within 1–2 minutes. Remove the cover, and the lamp should turn OFF.
Step | Action | Purpose |
1 | Power off | Prevents electric shock |
2 | Mount securely | Keeps IP65 seal intact |
3 | Orient north | Avoids false triggers |
4 | Wire tightly | Ensures stable circuit |
5 | Test sensor | Confirms proper function |
Engineer’s Tip: Don’t block the lens with your finger — skin transmits some light and may confuse the sensor.
What Mistakes Should You Avoid While Installing?
Even the best manufacturers’ photocell device can fail early if handled incorrectly. Here are the most frequent field issues and their fixes.
Problem | Likely Cause | Recommended Solution |
Light flickers on / off repeatedly | Sensor faces a lamp or a reflective surface | Rotate the sensor away from the light source |
Light never turns on | Wrong wiring or the neutral is not connected | Re-check wire order (Black = Line, Red = Load, White = Neutral) |
Light stays on all day | Lens covered by dust or building shadow | Clean lens / relocate sensor |
Short lifespan in coastal areas | Moisture/salt corrosion | Use JL-103D (IP65) with enhanced sealing |
Too sensitive in cloudy weather | Wrong Lux setting | Ask for custom Lux levels. Choose 50 Lux ON and 150 Lux OFF when you order. |
Simple checks help. They save hours of troubleshooting later.
How Do You Test And Care For The JL-103 Photocell For Long Life?
Regular inspection keeps your photocell for street light performing like new for years.
Follow these quick routines every 6–12 months.
Maintenance Table
Task | Frequency | Purpose |
Clean lens with dry cloth | Every 3 months | Removes dust and moisture film |
Check wiring tightness | Every 6 months | Prevents overheating and flicker |
Test sensor response | Every 6 months | Verifies correct lux threshold |
Inspect gasket seal | Yearly | Maintains IP65 protection |
Replace aged units | After 5 years | Ensures stable switching accuracy |
If the photo control still won’t respond after cleaning, stop. Test it using a light-sensor switch tester under a controlled test light.
Always cut power first. Then remove or replace the sensor.

How Does A Correct Install Boost Safety And Save Energy?
Install the outdoor photocell sensor correctly. Then each lamp runs only when truly needed.
For city engineers, it slashes operational costs. It also boosts public area safety.
Turn lamps off on time. This wastes less electricity and lowers carbon emissions for the planet.
If a photo cell sensor is miswired, it can switch too early or too late. That wastes energy and can leave areas dark during peak hours.
According to the International Dark-Sky Association, precise photocontrol cuts unnecessary night lighting. It protects human sleep cycles and wildlife.
Proper orientation and sealing keep water out. Water inside can cause short circuits easily. That means fewer outages, less maintenance cost, and safer streets.
Conclusion
Installing a JL-103 photocontrol isn’t just wiring. It’s a smart investment in reliability, energy savings, and safer city streets overall.
Follow the right steps and use waterproof connectors. Face the sensor north to keep dusk-to-dawn lighting steady, safe, and reliable for many years.
At Long-Join, we believe every light photocell sensor should deliver accuracy and endurance.
That’s why our engineers design each product to meet global standards and real-world challenges — from rainy coastal towns to desert heat.
When you choose Long-Join, you install more than a photocell. You install reliability, precision, and peace of mind.


