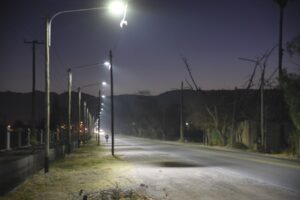
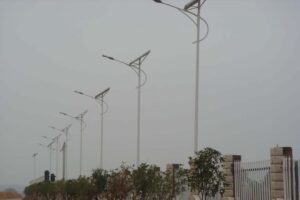
今すぐお電話ください!

+8615900829072

In the dynamic landscape of the lighting industry, the quest for efficient and automated lighting solutions remains paramount. Among the arsenal of technologies available, the integration of photocells stands out as a promising avenue for achieving automatic lighting control.

自動点灯ライトの作り方(光電セル)

導入

In the dynamic landscape of the lighting industry, the quest for efficient and automated lighting solutions remains paramount. Among the arsenal of technologies available, the integration of photocells stands out as a promising avenue for achieving automatic lighting control.

In this guide, we’ll delve into the process of creating an automatic light using photocells, a technology that senses ambient light levels and triggers the activation or deactivation of lighting fixtures accordingly. Understanding how to harness the power of photocells not only streamlines lighting operations but also contributes to energy conservation efforts and enhances user convenience.

Join us as we explore the practical steps and considerations involved in incorporating photocells into lighting systems, empowering you to leverage this technology effectively within the lighting industry landscape.

What Is an Automatic Light?

An automatic light, integrated with a photocell, operates on the principle of light sensing and control to regulate illumination levels autonomously.

The core component, the photocell or photoresistor, acts as a light sensor. It exhibits variable resistance based on incident light intensity. When exposed to daylight or sufficient artificial lighting, the photocell’s resistance decreases, indicating high light levels. Conversely, in low-light conditions, its resistance increases.

This resistance variation is harnessed by control circuitry within the automatic light fixture. When the photocell detects diminishing light levels, it triggers the control circuit to activate the light source, illuminating the environment. Conversely, as ambient light increases, the circuitry dims or switches off the light, conserving energy and optimizing efficiency.

Automatic lights with photocells find extensive applications in outdoor environments such as street lighting, parking lots, and perimeter security lighting. Indoors, they’re employed in areas requiring adaptive lighting, like offices, warehouses, and commercial buildings.

The primary advantage lies in energy efficiency and operational convenience. By responding dynamically to ambient light conditions, these lights minimize unnecessary illumination during daylight hours, resulting in substantial energy savings. Additionally, they enhance safety and security by ensuring consistent lighting levels and deterring potential threats in dimly lit areas.

Components Needed for Building an Automatic Light with a Photocell

Here’s a breakdown of the essential components required for this project:

Photocell (Light Sensor)

JL-207E光電セル

At the heart of the system lies the 光電池, also known as a light sensor. This component detects changes in ambient light levels and converts them into electrical signals.

Light Source

An integral part of the setup is the light source itself. This could be an LED bulb, fluorescent lamp, or any other type of illumination device suitable for the intended application.

電源

A reliable power supply is necessary to ensure uninterrupted operation. Depending on the specific requirements and installation location, this could range from batteries for portable applications to mains power for stationary setups.

Control Circuit

The control circuit acts as the intermediary between the photocell and the light source. It interprets the signals received from the photocell and regulates the output to control the illumination accordingly. This circuit may include components such as transistors, operational amplifiers, and integrated circuits for signal processing and amplification.

Housing and Mounting

To protect the components from environmental factors and facilitate installation, suitable housing is essential. This enclosure should be designed to withstand exposure to elements such as moisture, dust, and temperature variations. Additionally, provisions for mounting the system securely in the desired location must be considered.

By assembling these components and configuring them appropriately, you can construct an automatic light system that effectively responds to changes in ambient light conditions, providing illumination when needed and conserving energy when not in use.

Step-by-Step Guide to Building an Automatic Light with a Photocell

The control circuit acts as the intermediary between the photocell and the light source. It interprets the signals received from the photocell and regulates the output to control the illumination accordingly. This circuit may include components such as transistors, operational amplifiers, and integrated circuits for signal processing and amplification.

Step 1: Gather Your Materials

First things first, you’ll need to gather up all the materials you’ll need for this project. Here’s what you’ll need:

  • A photocell (also known as a light-dependent resistor)
  • An LED light
  • A resistor
  • A breadboard
  • Jumper wires
  • A power source (such as a battery or a power supply)
  • soldering iron and solder (optional for permanent connections)

Step 2: Understand How a Photocell Works

Before diving into the project, it’s essential to understand how the photocell functions. Essentially, a photocell’s resistance changes depending on the amount of light it’s exposed to. In bright light, its resistance decreases, and in darkness, its resistance increases.

Step 3: Connect the Components on the Breadboard

Now, it’s time to start building! First, place the photocell on the breadboard, making sure one leg is connected to the positive rail and the other leg to the negative rail. Then, connect one leg of the resistor to the positive rail and the other leg to the negative rail. Connect the LED to the breadboard as well, ensuring the longer leg (the positive side) is connected to a resistor.

Step 4: Wire Up the Circuit

Next, use jumper wires to connect the components. Connect one end of a jumper wire to the positive rail on the breadboard and the other end to the positive leg of the LED. Then, connect another jumper wire from the negative leg of the LED to the negative rail on the breadboard.

Step 5: Test Your Circuit

Before powering up the circuit, double-check all your connections to ensure everything is wired correctly. Once you’re confident everything is set up correctly, it’s time to test it out. Shine a light on the photocell and observe the LED. It should light up when the photocell is exposed to light and turn off when it’s in darkness.

Step 6: Fine-Tune the Sensitivity (Optional)

Depending on your preferences and the specific conditions of your environment, you might want to adjust the sensitivity of the circuit. You can do this by tweaking the value of the resistor connected to the photocell. Experiment with different resistor values until you achieve the desired sensitivity.

Step 7: Secure Your Components (Optional)

If you plan on using your automatic light for an extended period or in a specific location, you might want to consider securing the components to a more permanent base. You can do this by soldering the connections or mounting the components on a more robust platform.

結論

Creating an automatic light with a photocell boils down to mastering a few key steps. Begin by selecting a reliable photocell sensor and integrating it into your lighting system. Ensure proper wiring and calibration to optimize its functionality. Remember to test and adjust sensitivity settings as needed for seamless automation. With attention to detail and a solid understanding of photocell technology, creating your own automatic light becomes a straightforward endeavor.

参考文献

地元ユーザーに最適なおすすめガイド

上海LONG-JOINブランドメーカーは、20年にわたりNEMAシリーズコネクタとZhagaシリーズコネクタサービスの専門メーカーとして、海外ブランドの照明器具や電気製品の購入者の多様なニーズに幅広く対応してきました。

当社の製品

私たちについて

リソース

サービス

Copyright © 2024 Long-join. All rights reserved.

jaJapanese

喜んでお手伝いさせていただきます。NEMAコントローラー、Zhagaコントローラー、スマートシティ街路灯コントローラーアセンブリなど、LONG-JOINブランドの最新ビジネスシリーズを豊富に取り揃えております。心よりお祝い申し上げますので、メールアドレスをご登録ください。お客様の信頼できるパートナーとして、この歩みを続けていきたいと考えております。

JL-250FXA、JL-242JV、JL-260C、JL-207C、JL-208、JL-250F、JL-250G、JL-240XA、JL-205C、JL-103A、JL-403、JL-404C、JL-118A、JL-202シリーズ、JL-217C、JL-700、JL-700L、JL-711Aなど